
The tutorial shows in particular how my brother and I made the wing shaped details of our human Blood Bowl Blitzers. At the end of the tutorial you will find other examples of things that I have done using the same technique.
The materials needed are:
- Kneadatite Green Stuff from Sylmasta
- A+B white Modelling Putty from Sylmasta
- Talc/Talcum Powder
- Some Water
The tools needed are:
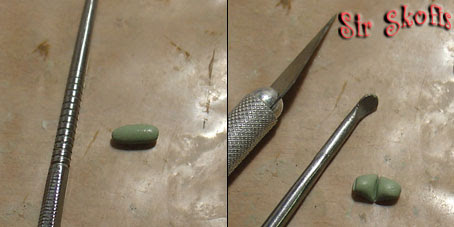
- Sculpting tool
- Hobby knife
- A dried out marker (or something that serves as a roller)
- The fingers (even if they doesn't appear in the image)

Step 1: Kneading the putty
- If we want to do something with putty this is the first step. I usually mix Green Stuff with A+B modelling putty but the technique that I'm going to explain works also using only GS and also using GS mixed with other putties. The next picture shows the 4 putty parts before kneading them, the 4 parts not yet well knead together and finally the parts mixed in and homogeneous greenish colour putty.

- Now putty is roll into a sausage and divided in two equals halves. I think is an easy way to divide the putty but it is not strictly necessary.
Step 2: talc + water mixture
- This is the key part of the technique. in this step some water and some talc are mixed together to obtain a translucent white liquid that will reduce a lot the tacky characteristic of the putty. The quantity of talc versus water is not something exact, add talc until the water don't accept any more.
I usually do the mixture on top of an old plastic that used to cover one of my old school books. I start by putting some talc in the plastic. Then I wet my fingers in a water recipient and drop some of it on top of the talc. When I think there is enough water I blend the talc and the water using the sculpting tool. When you tried you'll see that the water and the talc are not easy to mix together but with some perseverance is possible.

Step 3: Doing a Sheet of putty
- The putty now have to be soaked in the talc-water mixture. We also wet the side of a marker in the mixture. We start rolling the marker on top of the wet putty, making sure that the roller is always wet with the mixture, until the putty has the thickness searched. You'll see that the putty isn't stick to the plastic or the marker. If you want to make a cape or a banner you should wait around 20 minutes before trying to put the putty into a miniature so it is more cured, once in the miniature you could try to give it some form, some curvature.

Step 4: Giving form to the putty
- After the step 3, the putty will have a rounded form and we are interested in a more regular one. We start by cutting the outer shape of the thing we are trying to do from the rounded form, in this case a wing shape. It is useful to wet the edge of the hobby knife before doing the cuts.

- Now that we have the outer shape, we stat doing the details with a sculpting tool. First we mark two lines with the sculpting tool that are going to "hold" the feathers. Then we puss the flat part of the sculpting tool making the shape of the feathers. Later we cut the corners with a hobby knife to define a little more the feathers.

- Now with the knife be cut all the extra putty at the joint of the wing to the helmet and we have finished. When the putty is cured we glue the wings to a helmet or whatever you want.

The final result in our Blood Bowl Human Blitzers

Other examples
- Banner for my High Elves Caledorian Dragon Princes.

- Chapter Banner for my Spaces Marines Army.

- Raincoat for a Imperial Guard Commissar (the bottom part was made using this technique).

- I've also made some glyphs for my Orks, but only when they were to complicated to make in plastic card with straight cuts.

- Following more or less the same process of the blitzers helmet wings it is possible to make other small things like the scissors that I made form my Ork Dok. For simpler things I usually use plasticard like the tools that I made for my Ork Big Mek.

I hope you like this tutorial and you have found it useful. Feel free to leave any comments.
No comments:
Post a Comment